User Management
The User Management dashboard enables you to invite, update and revoke user accounts within your organisation.
In this article, we explain how to access the User Management settings and how to share evaluations with other users in your organisation. To learn more about evaluation sharing permissions, click here.
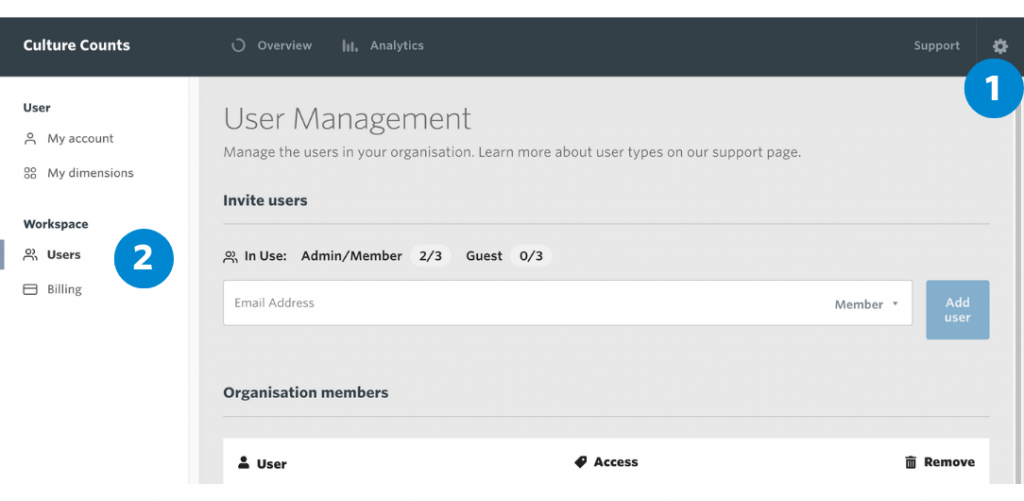
You can find the User Management page in the Settings. You can access settings via the menu on the top right corner of the platform. In the left-hand column, you will find ‘Workspace’ and ‘Users’ sitting beneath it. Selecting ‘Users’ takes you to the User Management page. Here you view, add, remove and update user permissions for your organisation.
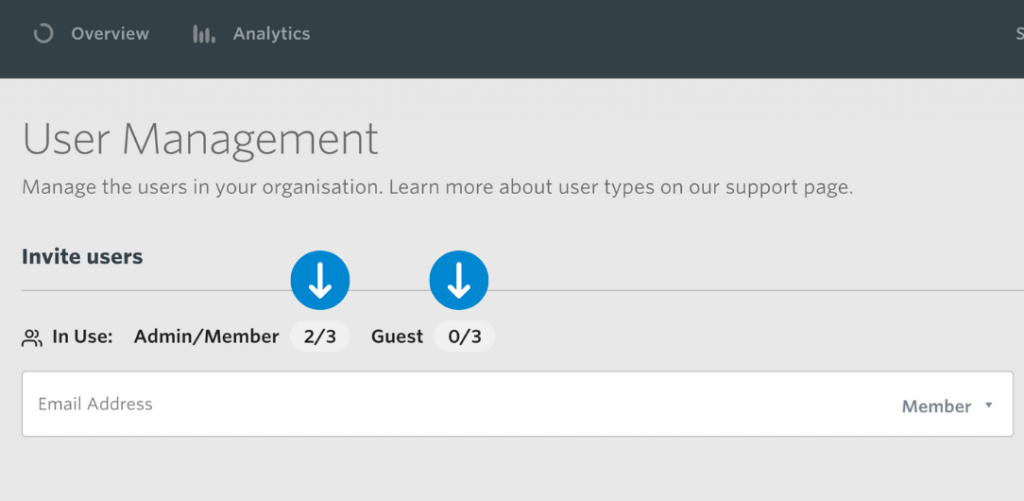
User Seats
The panel shows the number of user ‘seats’ available to you. Standard subscriptions have an allocation of three (3) Admin or Member user account seats, as well as three (3) Guest user account seats. Admin or Member ‘seat’ allocations mean that a user will receive their own account login linked to your organisation. The ‘User access levels’ section at the bottom of this page provides further information regarding seat permissions.
To add a user, input the user’s email address and then click ‘Add user’. This will send an invite to this user’s email address and add them to your organisation.
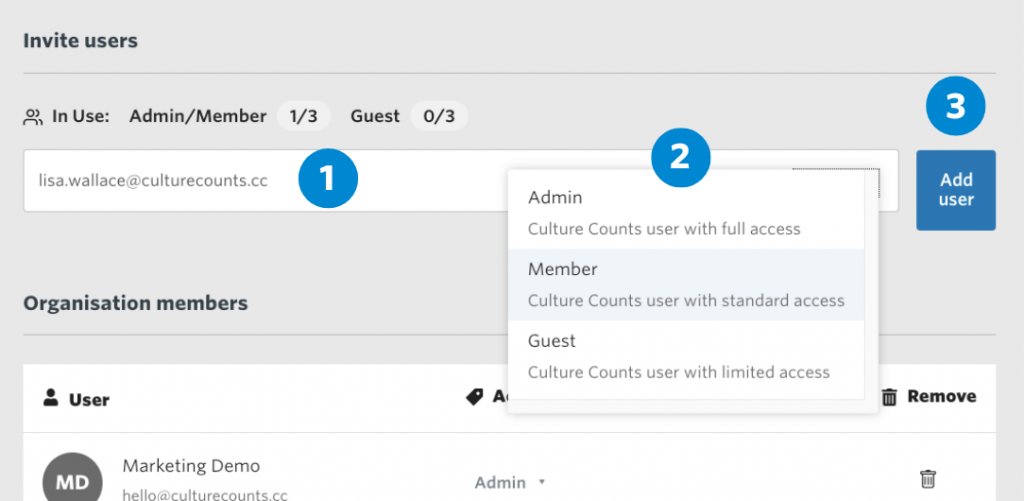
There are three access levels a user can have.
- Admin (full access): Can add and manage user access. Can create and share evaluations, edit surveys and view reports.
- Member (standard access): Can create and share evaluations, edit surveys and view reports.
- Guest (limited access): Can view only (evaluations, surveys and reports) and cannot edit.
Tip
Guest accounts are great for giving to people who would like to have access to data collected by your organisation, but without giving them the ability to change anything or access protected data fields.
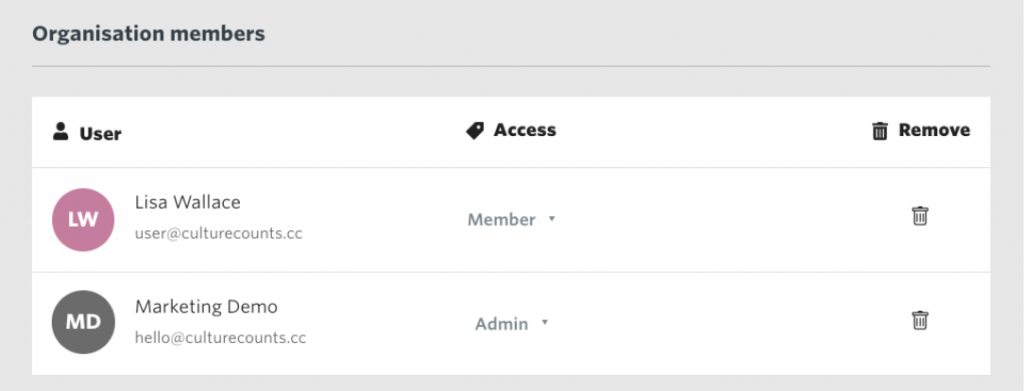
Admins can change the access levels of other organisation members by selecting the dropdown next to their user name. You can also remove a user from your account. Doing so will create a vacant seat in which you can add another user.
Manage Seats
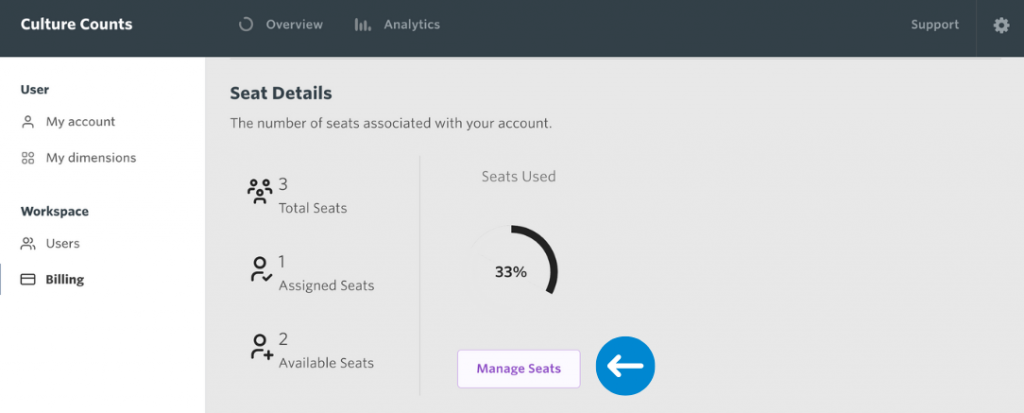
If you have opted for automated billing, it is important to note that you will be billed according to the total seats you have attached to your account. Standard subscriptions have 3 x admin/member seats and 3 x guest seats.
Under the ‘Billing’ heading, you will be able to see how many available seats you have remaining and how many you are currently using. You can update your seats using the purple ‘Manage Seats’ button.
User Access Roles
The following table displays the access assigned to each user role.
| User Access | Admin | Member | Guest |
|---|---|---|---|
| View evaluations (individually assigned) | ✔️ | ✔️ | ✔️ |
| View evaluations (org assigned) | ✔️ | ✔️ | ✔️ |
| View reports in dashboard | ✔️ | ✔️ | ✔️ |
| Create evaluations | ✔️ | ✔️ | ✖️ |
| Share evaluations | ✔️ | ✔️ | ✖️ |
| Edit reports in dashboard | ✔️ | ✔️ | ✖️ |
| Edit evaluation share permissions | ✔️ | ✔️ | ✖️ |
| Create surveys | ✔️ | ✔️ | ✖️ |
| Edit surveys | ✔️ | ✔️ | ✖️ |
| View user management page | ✔️ | ✔️ | ✖️ |
| Change user account permissions | ✔️ | ✖️ | ✖️ |
| Add new user accounts | ✔️ | ✖️ | ✖️ |
For more information about account types and evaluation sharing, click here.
